Your first Sitecore Search Crawler


You just got access to Sitecore Search. Full of energy, you login for the first time and you stare at the screen with absolutely no idea what to do next. This was me, just a few months ago. In the meantime, I spent quite some time with the tool and it turns out, configuring your first crawler does not have to be overly complex.
Modeling your content
Sitecore Search uses entities and attributes to represent your content. An entity is simply a collection of attributes.
For our example, we will use an entity called Content and some simple attributes for Title, Description and Content Type.
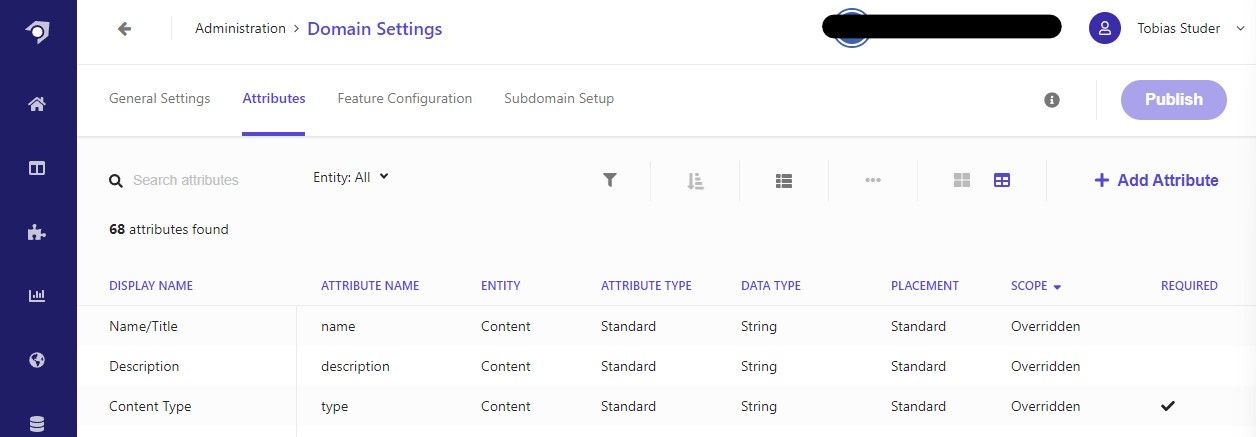
You can access the attributes in the Domain Settings in the Administration section. We will go in more depth about the configuration of attributes in another blog post.
If you get an error while adding a new attribute, try a hard refresh of the page and add the attribute again.
Defining a Source
To get content into the search index, you need to setup a source. You can find the Sources section in the main navigation.
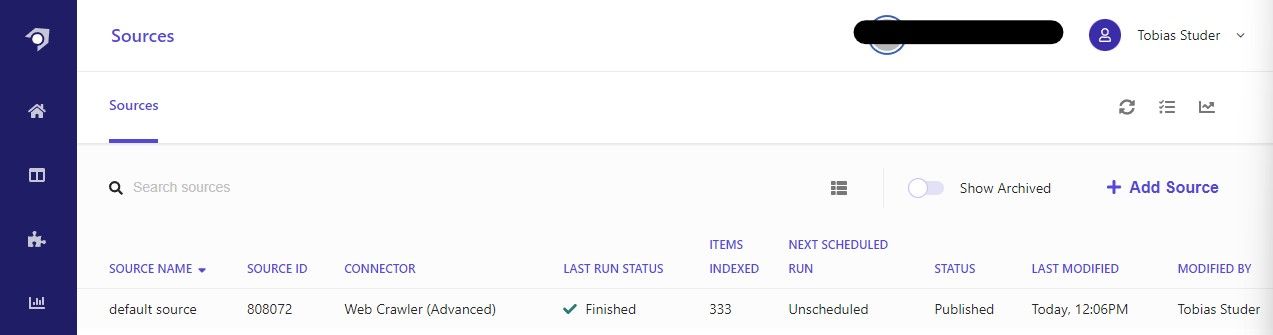
We will name it default source and select Web Crawler (Advanced) as our connector. This will give us the ability to index content in multiple languages and write JavaScript to extract attributes from the website.
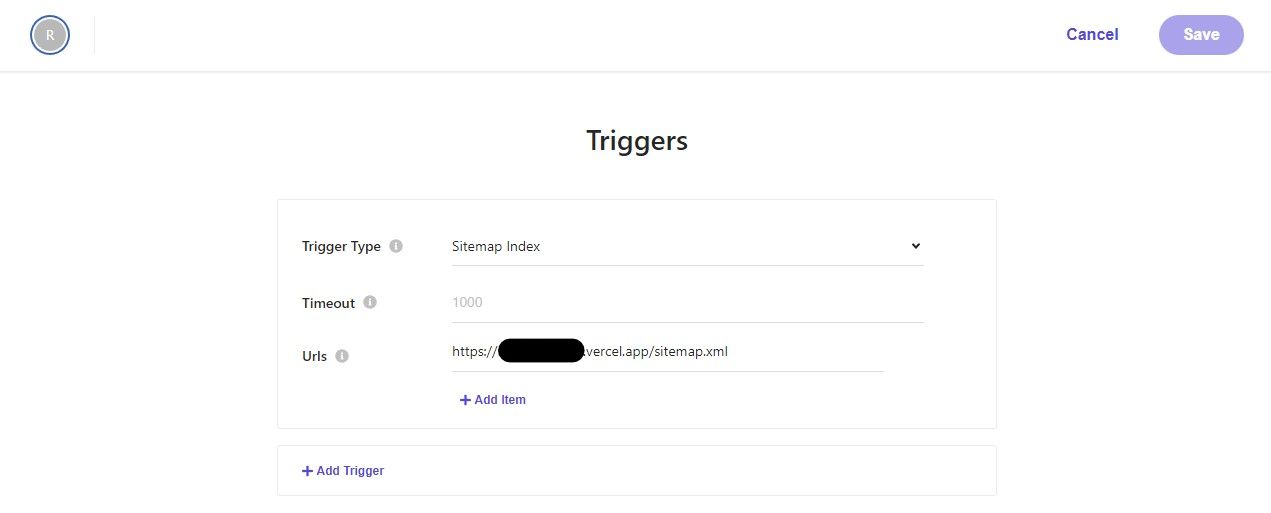
To get your first Sitecore Search Crawler setup, you only need to define a trigger and a document extractor.
Setting up a Trigger
A trigger is the starting point that the crawler uses to look for content to index. For our example, we assume you're using SXA Headless on an XM Cloud solution in combination with the sitemap feature.
Setting up a Document Extractor
A document extractor adds an index document from your source content for each URL. We create a JavaScript extractor with one tagger.
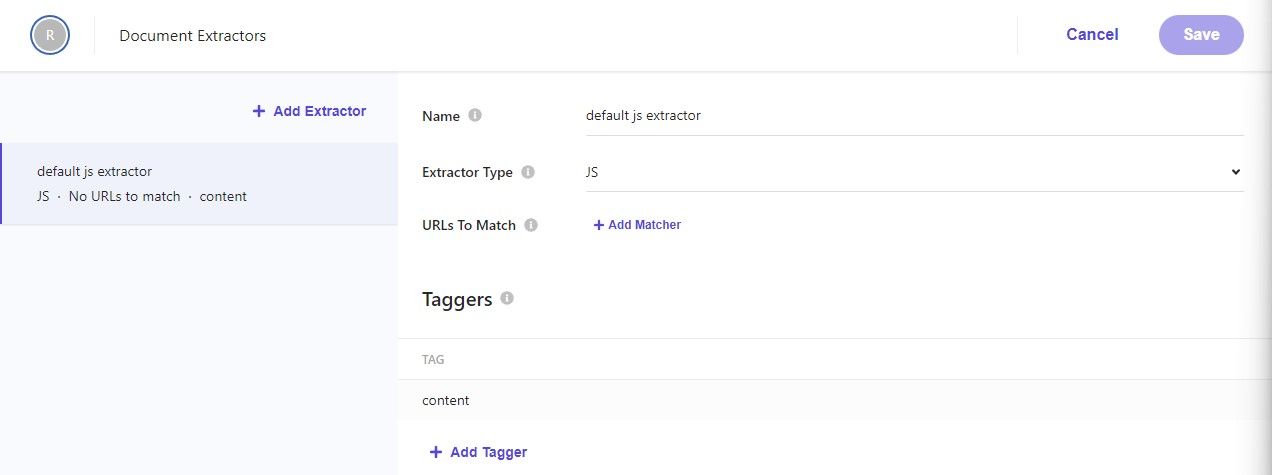
The tagger is your JavaScript code that reads data from the website and adds it to the index document. A very simple tagger for our example could look something like that:
function extract(request, response) {
  $ = response.body;

  var pageContentType = $('meta[name="content_type"]').attr('content') || 'Content';

  var title =
    $('h1.intro__title').text() ||
    $('meta[property="og:title"]').attr('content') ||
    $('title').text();

  var description =
    $('meta[name="description"]').attr('content') ||
    $('meta[property="og:description"]').attr('content') ||
    $('div.intro__content').find('p').text();

  return {
    type: pageContentType,
    name: title,
    description: description,
  };
}
We read the pageContentType from the meta tags. The title we try to extract from the content itself, with fallbacks to other properties of the page. For the description, we do the opposite - check meta tags first and fallback to the content later. Then, we return a JavaScript object, where the properties must match the attribute names defined earlier.
Publish the changes
Once you finished your configuration, you need to publish the source. Publishing will also add a recrawl job to the queue. The job will use the trigger as a starting point and use the document extractor to create the index documents.
Check the Index
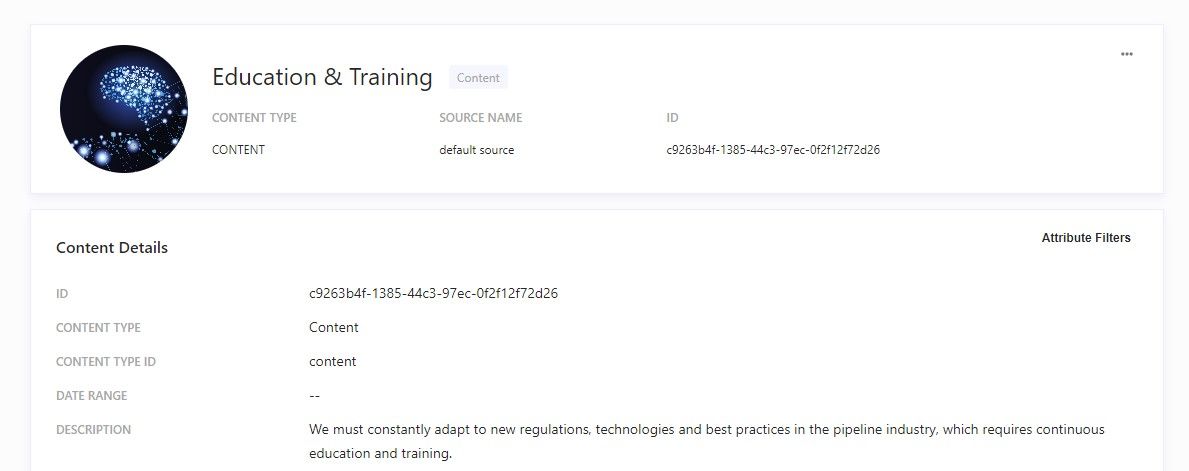
After the index job has finished, you can look at the indexed documents in the Content view in the Content Collection main navigation entry.

Clicking on an entry reveals the attributes and their values.
Outlook
With this very high-level introduction to Sitecore Search, we are only starting to scratch the surface of what it can add to your platform. In future blog posts we will look at other aspects of the tool and also go deeper in certain areas to start leveraging the full potential Sitecore Search.